Star Wars spoof shot at the Sharper Image!
Sunday, May 18, 2008
Friday, May 16, 2008
Thursday, May 15, 2008
Wednesday, May 14, 2008
Tuesday, May 13, 2008
Wide Angle...
This is my photo for Day 90 in my 365 Project. I followed a tutorial on building your own wide angle lens. It's pretty hard to focus but very fun to play around with. Built the lens for about $14.

I won...
Yep! I won the contest. Just got an email from them and they said they love it and asked for my address to send me my copy of the CD. Ha! I'm happy now!
Monday, May 12, 2008
Sun Domingo...
 Poster I designed for Sun Domingo. If they end up using it, then they'll send me a signed copy of their new cd. Plus it will be posted all over Charlotte for their show. Stay tuned and I'll keep you updated.
Thursday, May 8, 2008
Lilly Driving...
TJ put Lilly's car in neutral from the back seat. She freaks out as I'm yelling GO!!! GO!!!! When she finally realized what happened, she's laughing so hard she can't see to drive. This is where the video picks up...
"Am I on video!?"
"Am I on video!?"
Customer Hunter...
Customer Hunter
Video shot when I worked for The Sharper Image. I can post this now because everyone has been fired and the company is sinking faster than the Titanic. Enjoy...
Video shot when I worked for The Sharper Image. I can post this now because everyone has been fired and the company is sinking faster than the Titanic. Enjoy...
Wednesday, May 7, 2008
Free Lens Hoods...
Wow. This is a wonderful site!
This site contains PDF documents that can be printed and cut out to make lens hoods for a variety of 35mm and digital SLR camera lenses. Lens hoods give better quality photographs by reducing flare caused by nonimageforming light.
Printable lens hoods offer a number of advantages over their costly counterparts:
- Ultra compact - can be carried unfolded.
- No waiting to order one - simply download, print, cut-out and attach.
- Redundancy - don't worry if you lose one; just print another!
- 100% recyclable.
- Can be modified to cater for different digital SLR sensor crop factors.
- Available in both 'rounded' and 'petal' versions.
And best of all...
- They're absolutely free!
Why not just buy a real lens hood?
A brand new replacement lens hood for the Canon EF 600mm f/4 L USM IS costs a whopping £439.99. Alternatively, you can download it from this site for free! Granted, the genuine item is likely to be a bit sturdier, but that's still £439.99 you're saving!
Even modest lens hoods are pretty expensive. For example, a replacement lens hood for the Canon EF 24-70mm f/2.8 L will set you back £45.99. Even the most basic lens such as the Canon EF 50mm f/1.8 II will cost you £17.99 if you want to add a lens hood. While these hoods are arguably of top quality compared with those available from this site, they all serve the same purpose at the end of the day.Sunday, May 4, 2008
Tutorial...
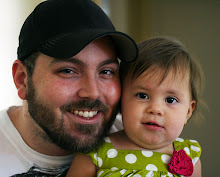
I've never done a tutorial before with photoshop, so I hope this all makes sense.
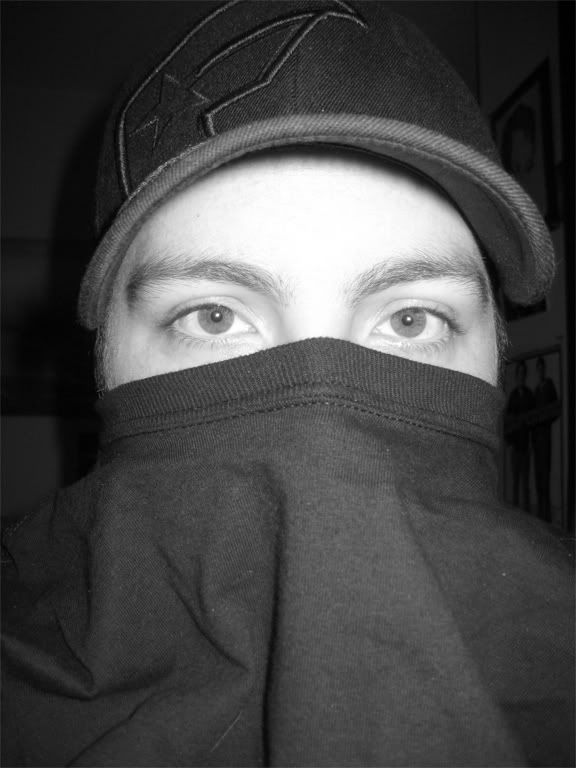
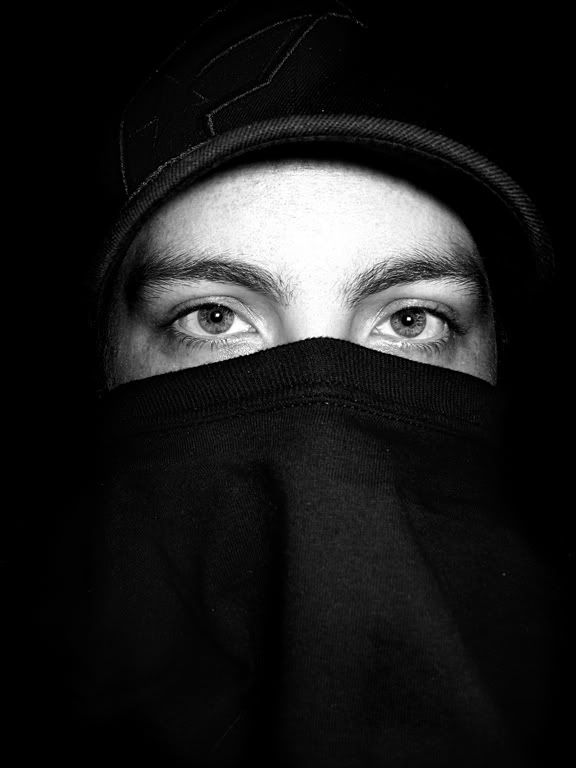
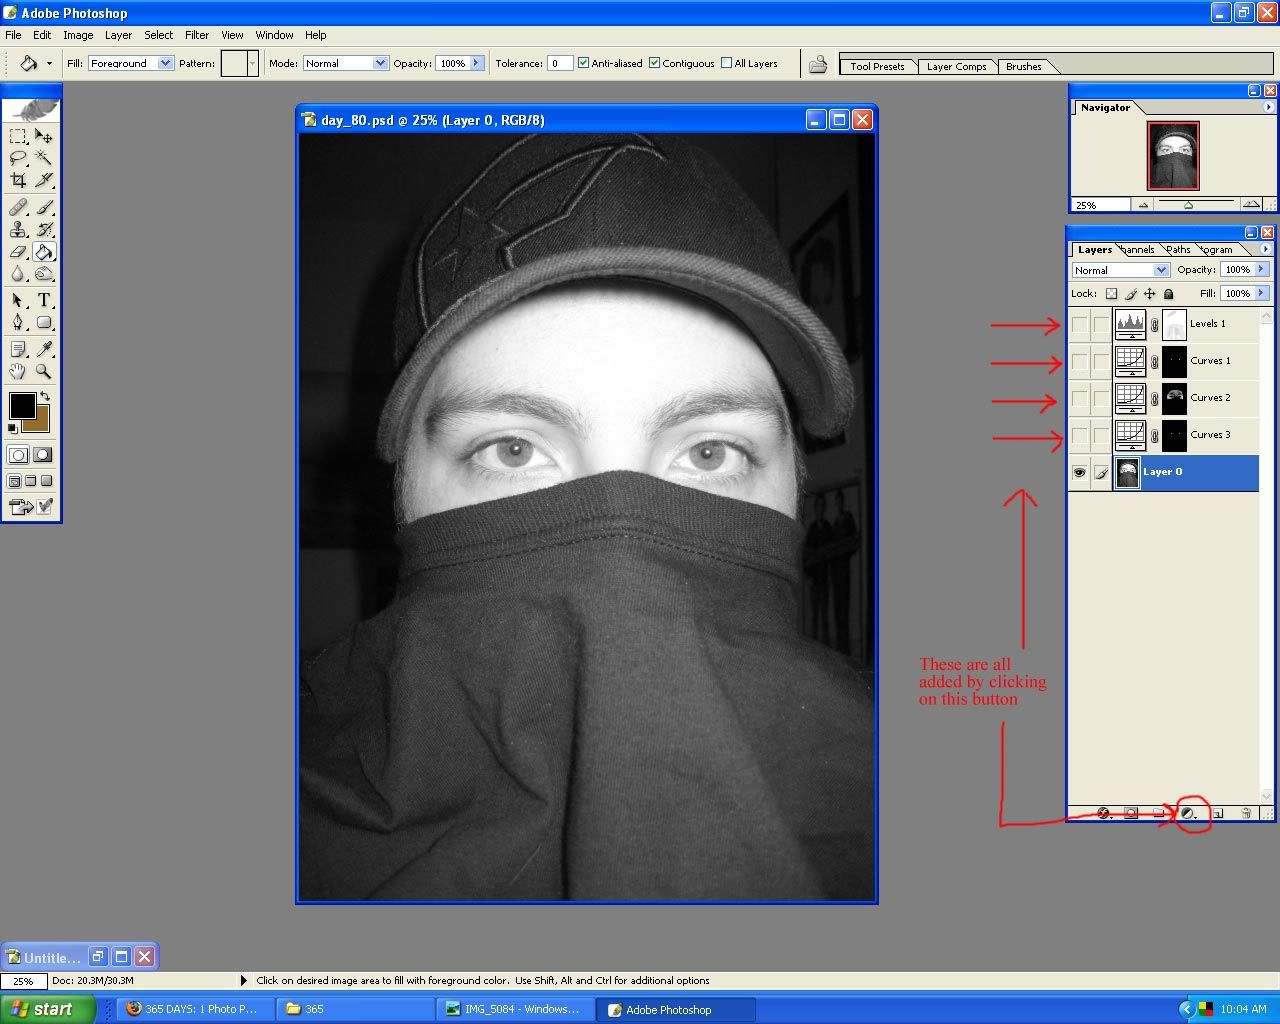
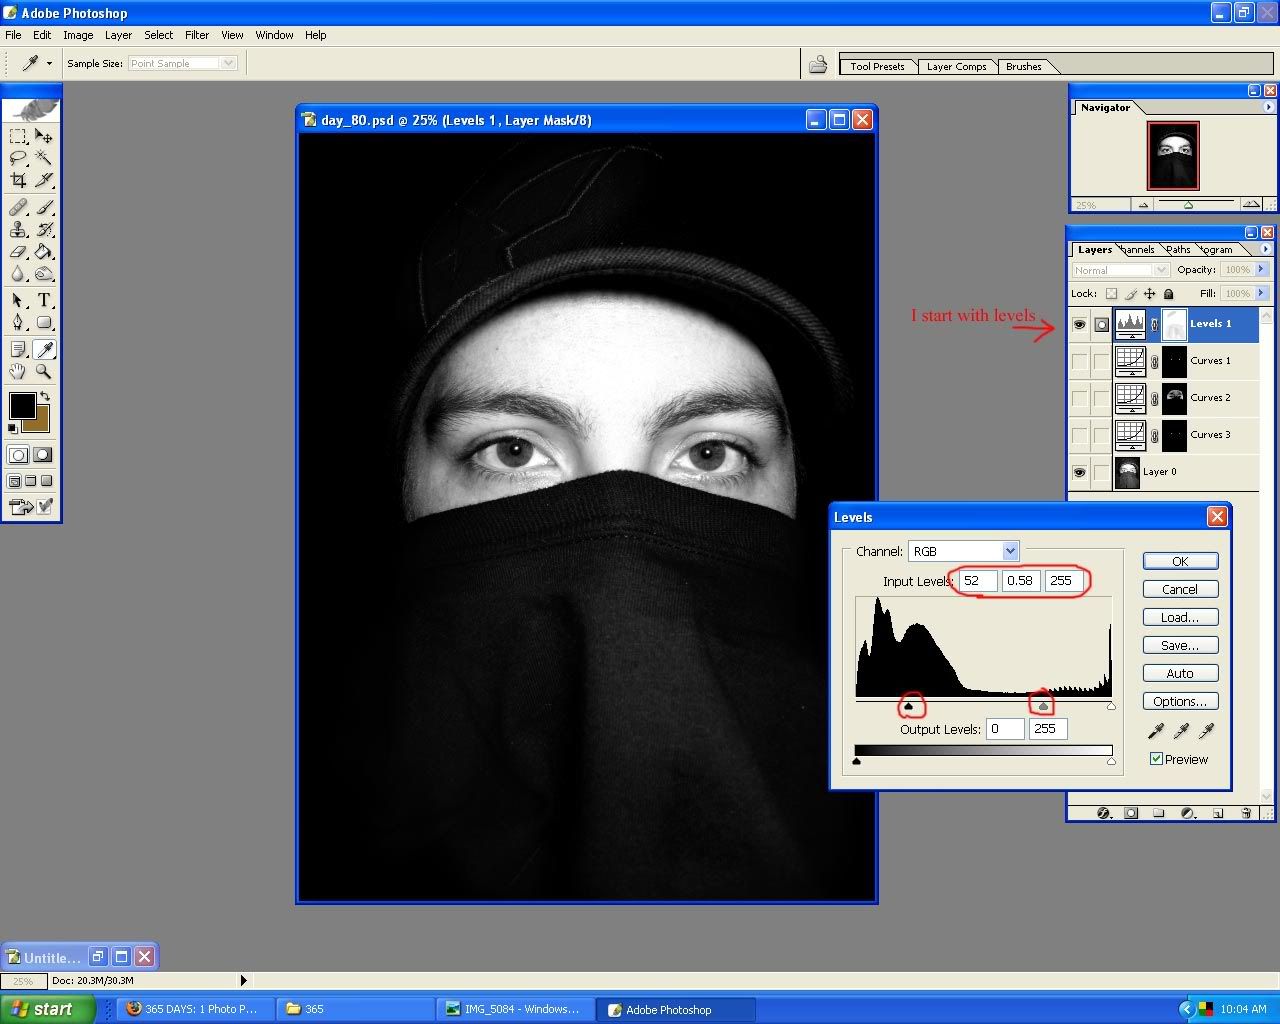
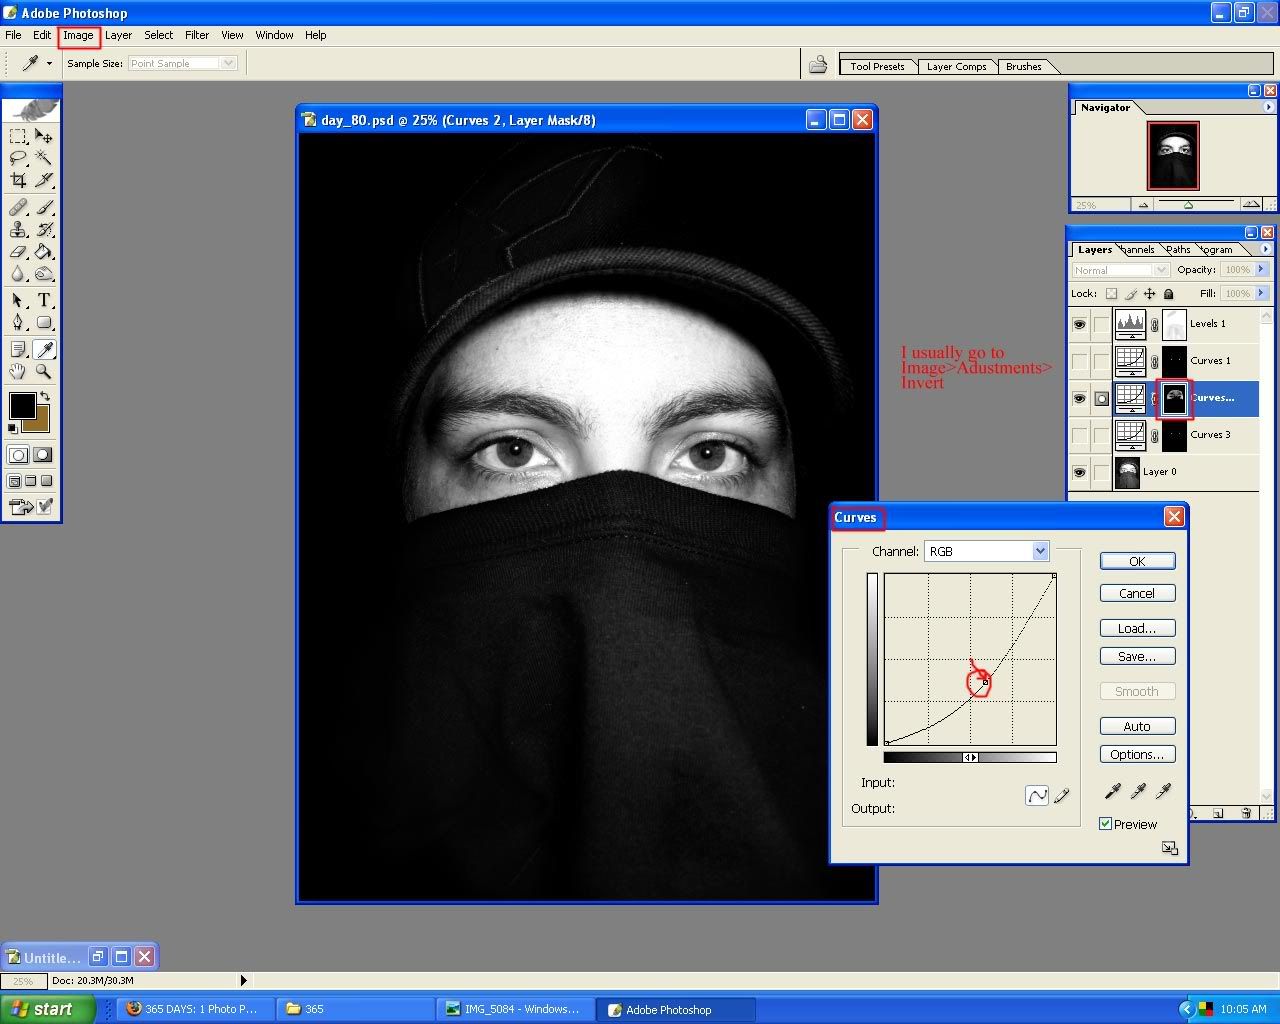
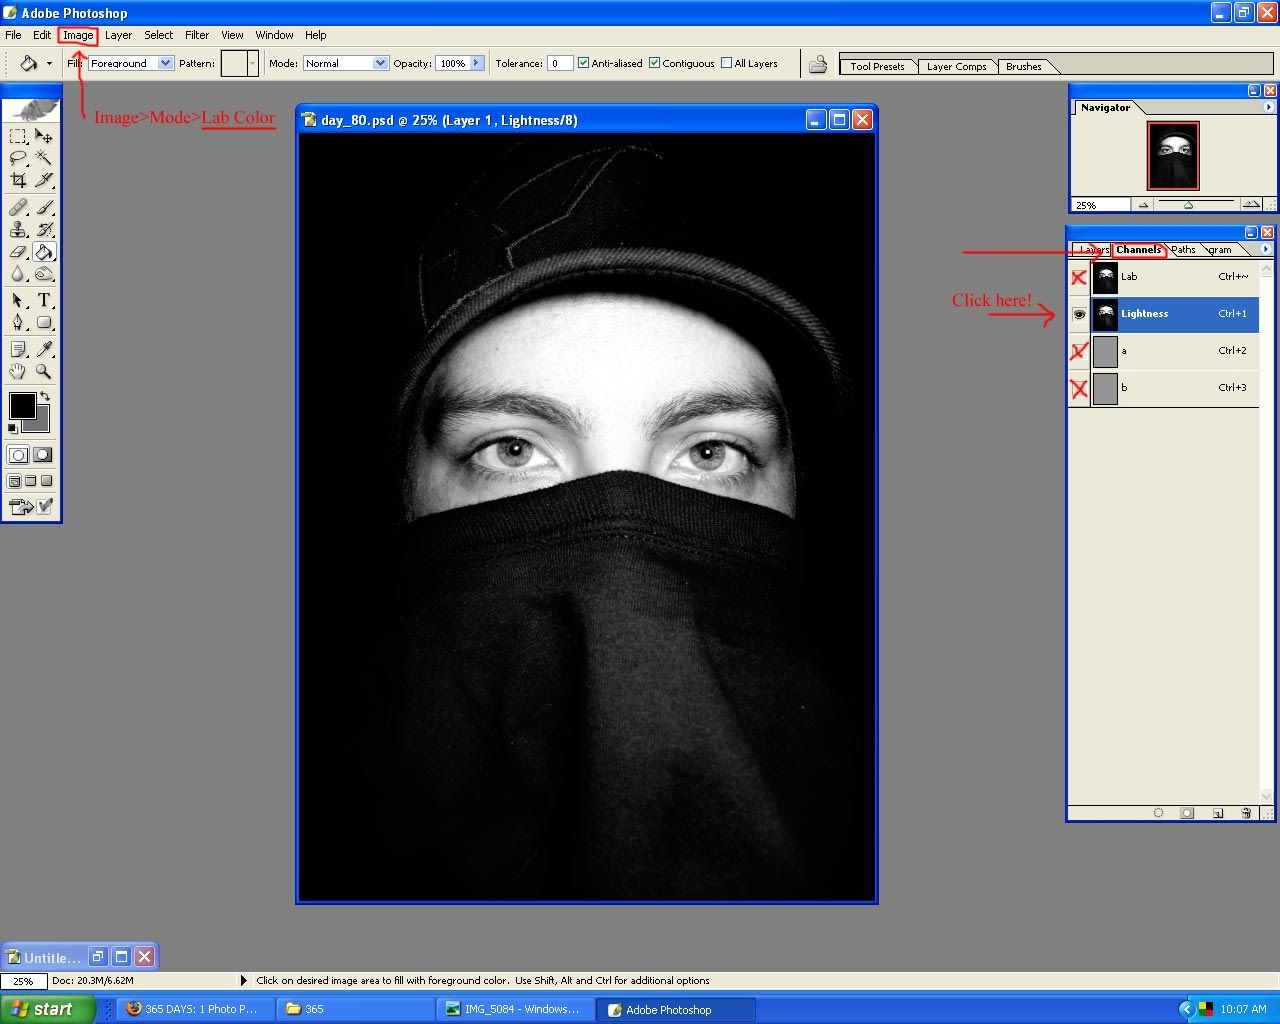
This will take any ordinary photo and make it "pop." The first thing you need to know, is that every thing is done with layers and masks. Each time you create a new adjustment layer, it also has a mask that goes with it. The mask works like this. You create an adjustment layer to make things darker. Suppose you only want the background darker but not the face. You would then go to your mask, which is located directly next to the adjustment, and paint out the face. Why would you paint it? Because the mask works in black and white. White being the adjustment you've made and black basically erasing it and putting it back to the way it was. So if the face looks fine, then you'd just paint black on the areas you wouldn't want to be affected with the adjustment. Having said that, I usually make adjustments to selected parts of the photo at a time, as to be more precise. This means that if I want to change only the way the eyes look, I'd make the adjustment while focusing on the eyes. But wait, isn't everything affected? Yes. But, you will then go up to Image>Adjustments>Invert. This will cause the mask to the adjustment you've just made to go from white to black. Black being absolute zero. This makes the photo look as it was before you adjusted it. Now, all you have to do is go and paint the areas white that you want to be affected by the adjustment layer. So I would go and paint the the mask white where the eyes are.
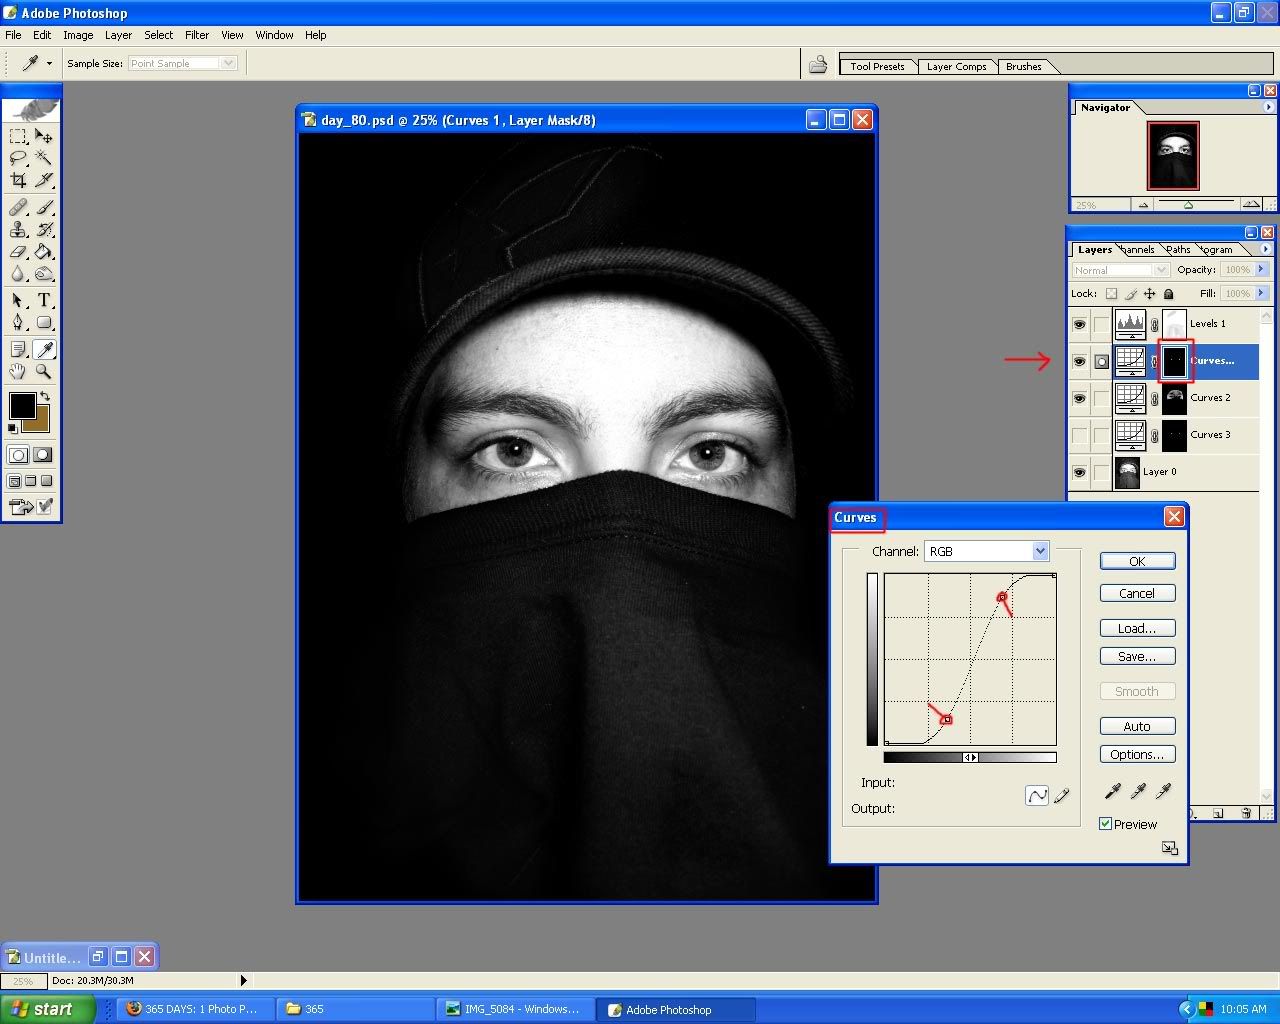
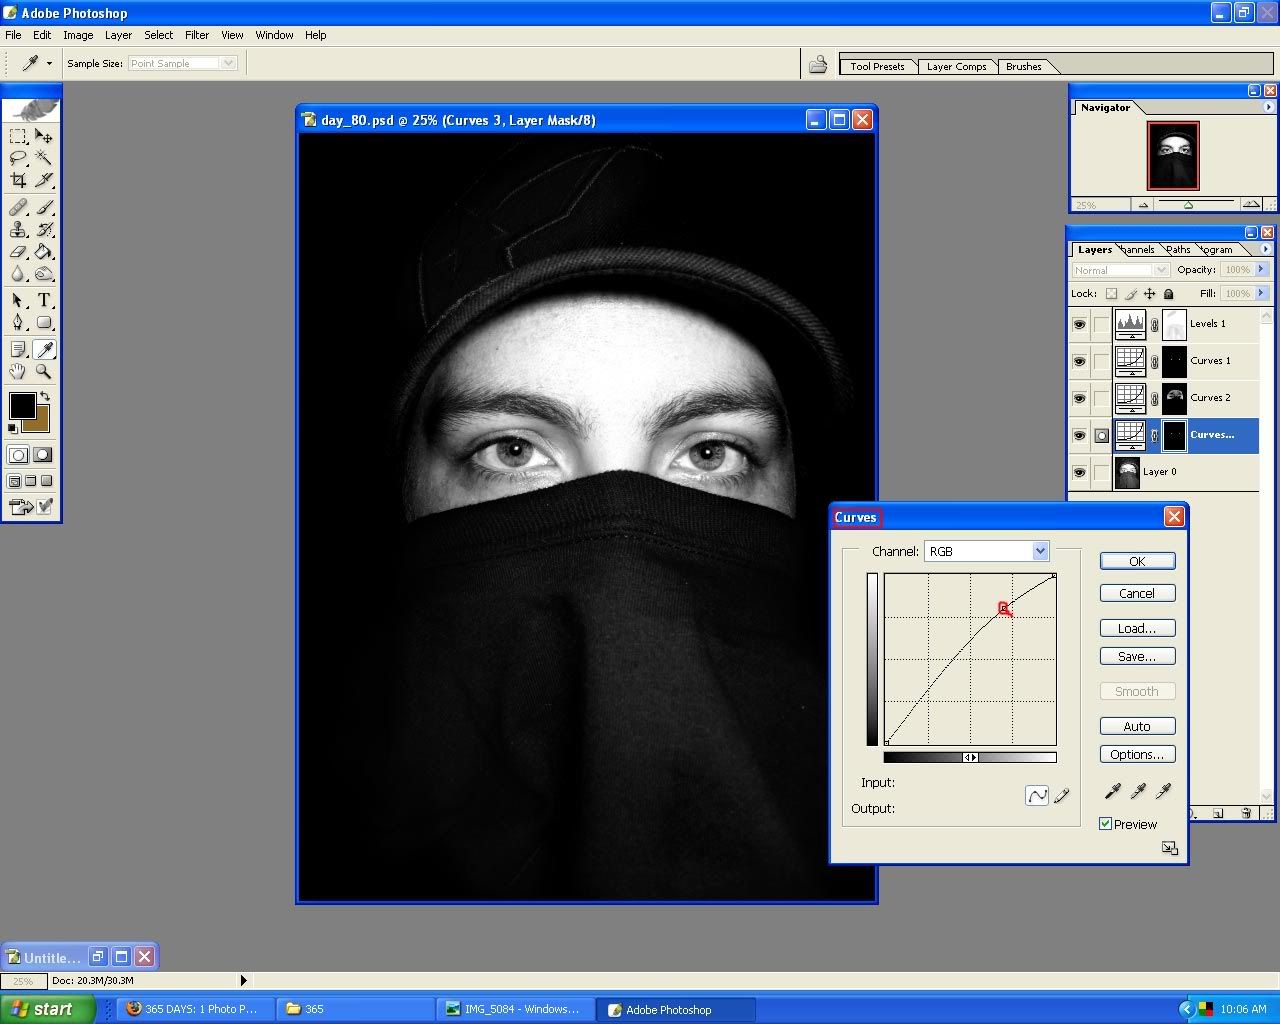
As far as what to do with these levels and curves adjustment layers, that is up to you. You will just have to play around with the curves, levels, etc. to see what works best for you. You can click on any of the tutorial images below to enlarge them and study them to see what I have done.
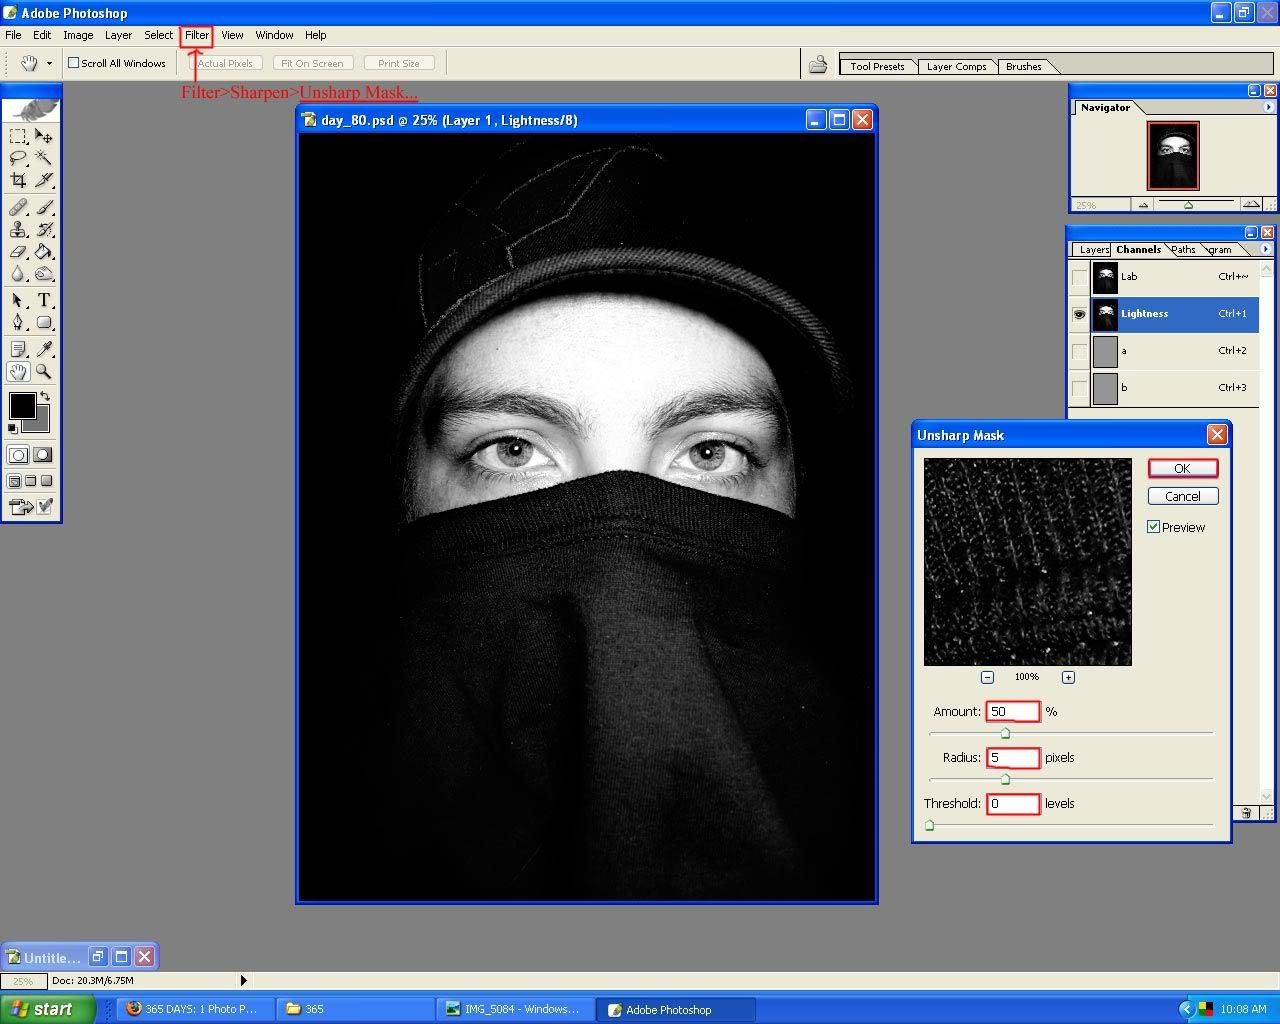
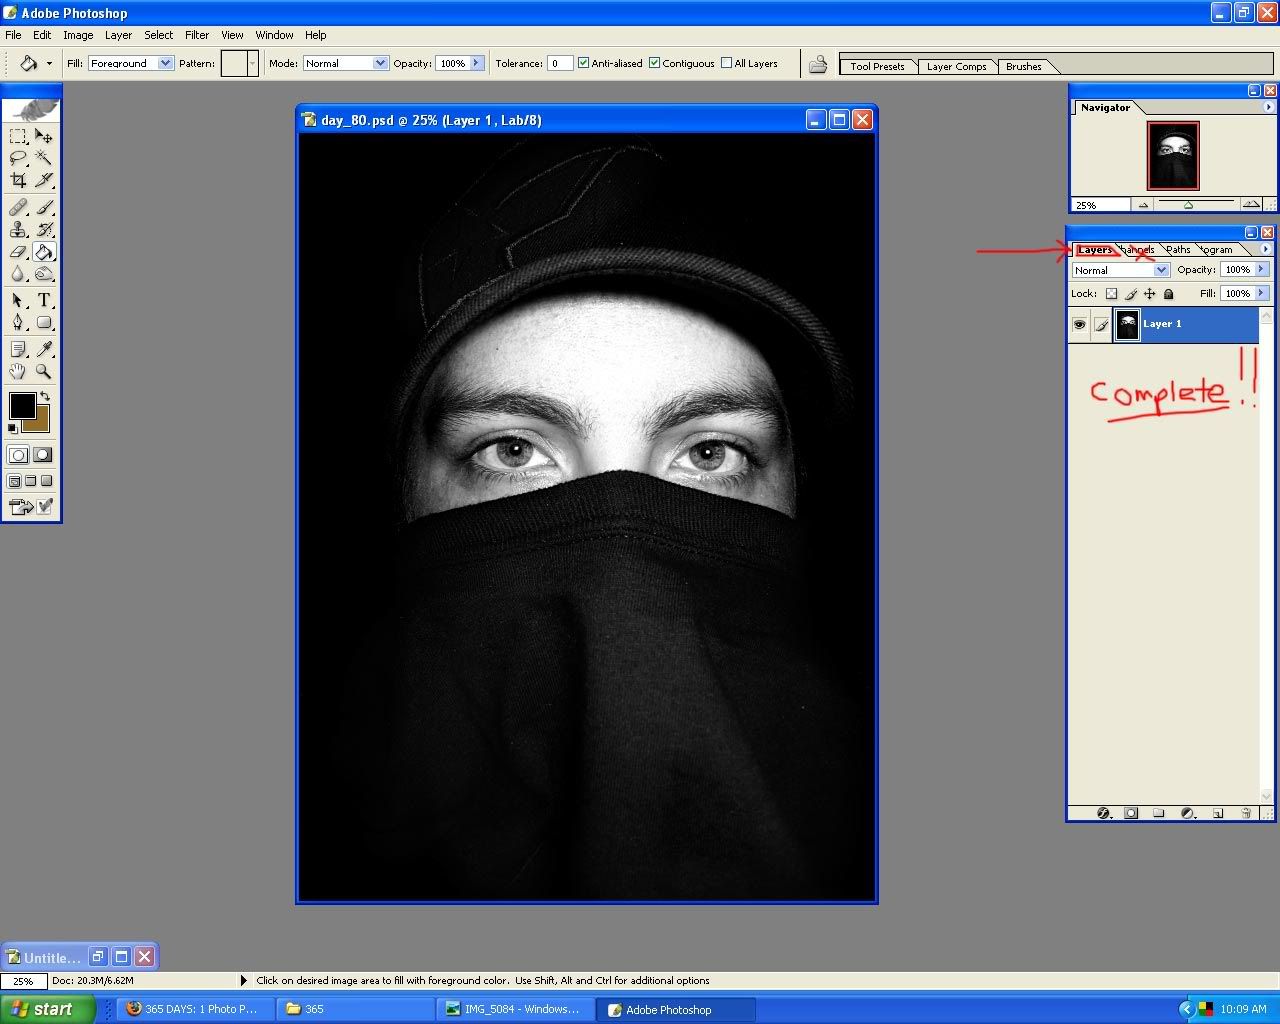
When you have made all your adjustments and you have the image the way you want it to look, you may want to sharpen it. It is very important to use this sparingly. You do not want to over sharpen your image or it will look nasty. See my examples below to check what my settings were for this photo. Those are generally the settings you'd want to use for sharpening. And as with anything else, you can use a mask with it as well. For example, if you had a picture of a flower that you wanted to look sharper, but not the background, you'd use a mask. You would just paint out the background so that only the flower is affected. Thus, putting more focus on the flower and not the distracting background.
Hope this tutorial has been helpful. Let me know if you have any questions about anything!
This will take any ordinary photo and make it "pop." The first thing you need to know, is that every thing is done with layers and masks. Each time you create a new adjustment layer, it also has a mask that goes with it. The mask works like this. You create an adjustment layer to make things darker. Suppose you only want the background darker but not the face. You would then go to your mask, which is located directly next to the adjustment, and paint out the face. Why would you paint it? Because the mask works in black and white. White being the adjustment you've made and black basically erasing it and putting it back to the way it was. So if the face looks fine, then you'd just paint black on the areas you wouldn't want to be affected with the adjustment. Having said that, I usually make adjustments to selected parts of the photo at a time, as to be more precise. This means that if I want to change only the way the eyes look, I'd make the adjustment while focusing on the eyes. But wait, isn't everything affected? Yes. But, you will then go up to Image>Adjustments>Invert. This will cause the mask to the adjustment you've just made to go from white to black. Black being absolute zero. This makes the photo look as it was before you adjusted it. Now, all you have to do is go and paint the areas white that you want to be affected by the adjustment layer. So I would go and paint the the mask white where the eyes are.
As far as what to do with these levels and curves adjustment layers, that is up to you. You will just have to play around with the curves, levels, etc. to see what works best for you. You can click on any of the tutorial images below to enlarge them and study them to see what I have done.
When you have made all your adjustments and you have the image the way you want it to look, you may want to sharpen it. It is very important to use this sparingly. You do not want to over sharpen your image or it will look nasty. See my examples below to check what my settings were for this photo. Those are generally the settings you'd want to use for sharpening. And as with anything else, you can use a mask with it as well. For example, if you had a picture of a flower that you wanted to look sharper, but not the background, you'd use a mask. You would just paint out the background so that only the flower is affected. Thus, putting more focus on the flower and not the distracting background.
Hope this tutorial has been helpful. Let me know if you have any questions about anything!
Saturday, May 3, 2008
Foul Ball...
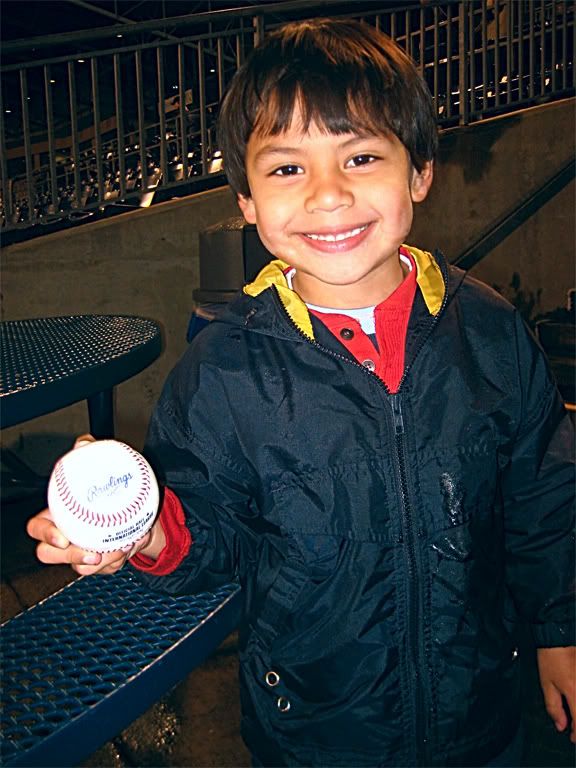
I forgot to post this. Monday I took Michelle and Dominic to the Durham Bulls game that was hosted by the company I work for. At the game I caught my first ever foul ball. I had no choice really. The ball flew directly at the stands, ricocheted off the barrier, sped towards my face, bounced off my hand as I attempted to catch it, and landed directly in Michelle's lap. I also caught a free t-shirt that was shot from a t-shirt gun. Guess it was my lucky night!
The Power of Photoshop...
The human eye sees things differently than a camera lens can see. Our eyes are constantly adjusting to light so that we can see everything in a high dynamic range. When you take a photo, you only see it as it was captured. This is where photoshop comes in.
Photoshop is a very powerful program to have. Knowing the things you can do with photoshop will make you take photographs differently. Take the pictures below for example.
I saw that the sky was a beautiful color. Now I can take a photo of the sky and see it nice and clear, but I have to turn the exposure down on my camera to be able to photograph it properly. The problem is that you then can't see the field. I could take a photo of the field and the players but the sky would be blown out.
So, I know in photoshop you can use layers. I know you can use masks. So I take the photo to capture the sky. You choose this option because you can always pull the color back out of a dark photo, but you can't save a photo that has been blown out. By blown out, I mean that it is too bright and the white levels have washed out the detail.
Before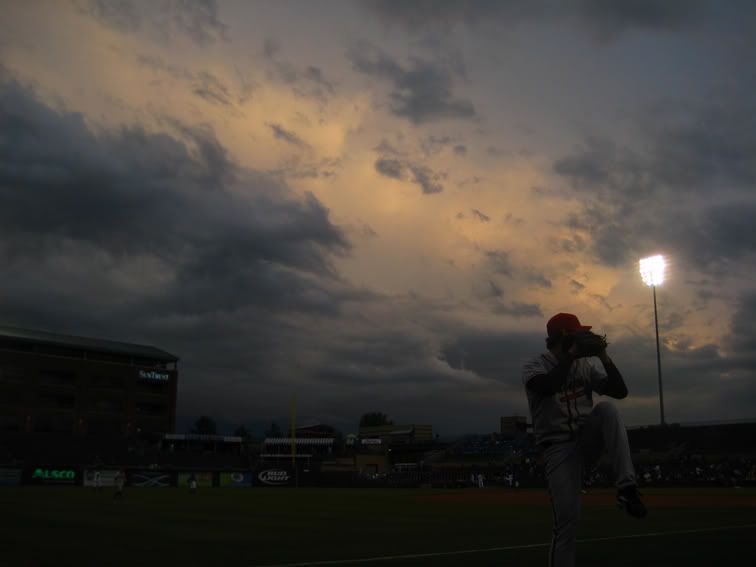
I took the photo so that the sky would show and the players are dark
After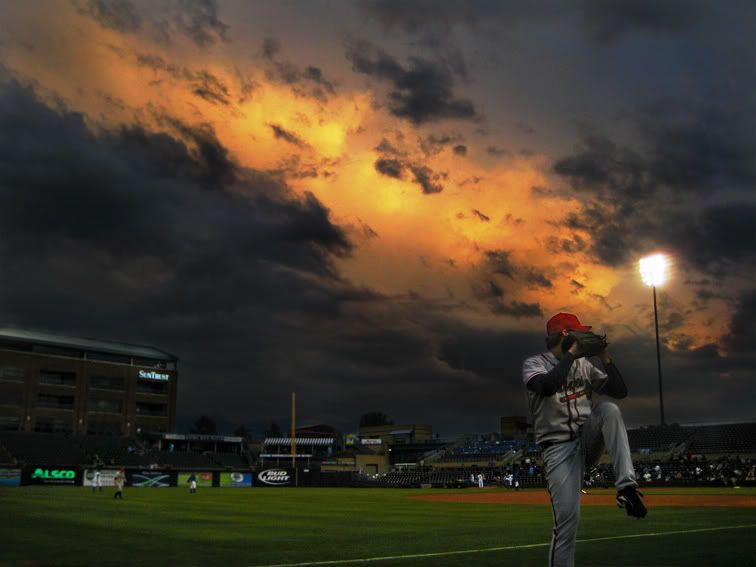
I used layers with masks and curves to pull out the color from the field and the sky. Leaving me with this beautiful photo! :)
I used layers with masks and curves to pull out the color from the field and the sky. Leaving me with this beautiful photo! :)
Friday, May 2, 2008
Sharper Image is Gay...
Last year, The Sharper Image fired me for posting videos on YouTube. I wish I could fire them for posting this. Oh wait! They are bankrupt! hahahahaha! With products and videos like these, it's no wonder. Way to go idiots!
Wolfmother...
Today Lilly, TJ, and I rode together for lunch today. This is what happens when you put three really bored people together...
Song by Wolfmother. Awesome action by me.
Thursday, May 1, 2008
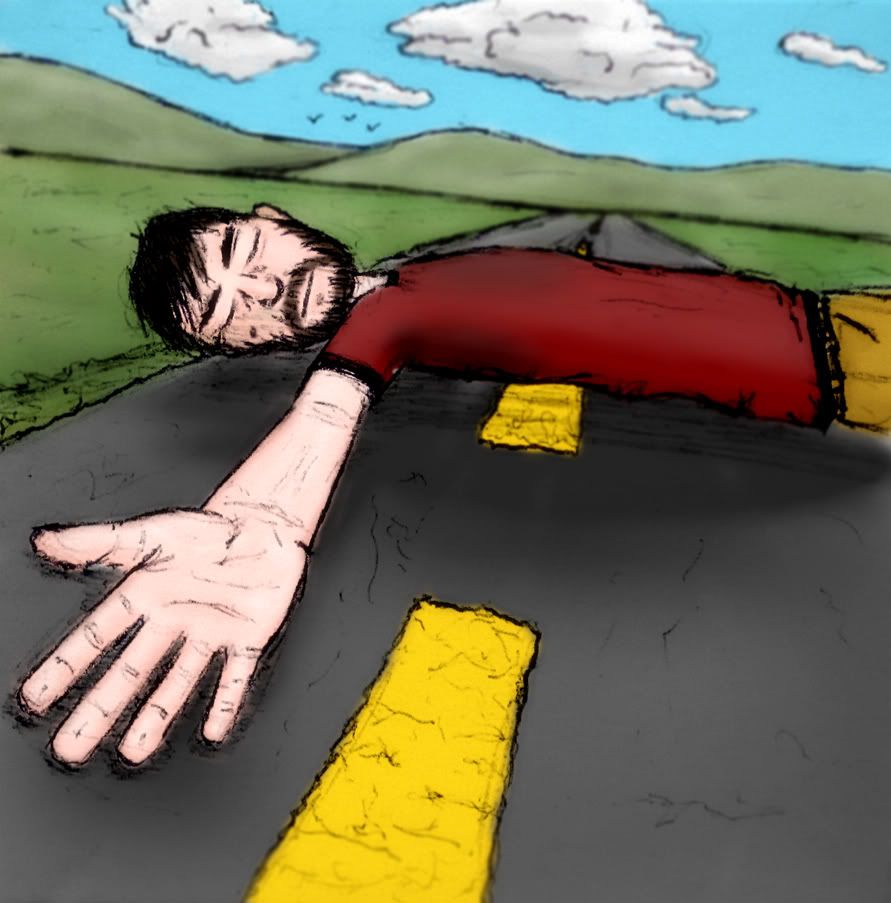
More Art...
A method for dissociation. This is the title of the story that inspired this picture. Go read Todd's story and see if you think this image fits well with the story.
Death Waits...
Death stares Life in the face
Challenging Life to fight back.
Life is younger and not as strong as Death.
This is nothing new.
Death has always challenged Life.
Try as they might, they could never be friends.
The fear of Death subsides.
Life goes on.
Death waits.
Allowing time for Life to grow older
To grow weak.
Death Awakens
Thirsty for blood
Searching for a kill.
Death Knocks down Life's door.
Returning to finish off Life.
Life runs and hides
Crouched in a corner
Praying for help
Death finds Life.
Death ends Life.
A new Life is born.
Death waits.
Both Ends of the Spectrum...
The Unlucky Part: I was playing my brand spankin' new Grand Theft Auto 4 game. Running a muck all over the city. When all of the sudden, FREEZE! No, that wasn't a cop yelling freeze. That was my game freezing, locking up, ceasing to exist. Yeah... Anyway, I turned the damn thing off and went to bed. While I was at work I pulled up google and searched for "GTA IV" only to find that a lot of people have been getting this same error. Great... So I go home and turn on my game. What do you think happens? NOTHING. The game is screwed. Well... yay.
The Lucky Part: So I call Gamestop in the mall and tell them that I know there are problems because I read it all over the internet. I tell them that my game is screwed and expect to hear nothing good from this guy on the phone. To my delight, he tells me to come right in and pick up another copy. Ok... That was easy. So I drive over to the mall, not to happy to be there, but I'm about to get a new game so whatever. Do the 'ol switch'a'roo. Then back to the house I go. The new game works perfect. But wait... What is this? What is this I have found in my game box??? Holy Hell! It's a coupon card with 1 Month of free XBOX Live gameplay! Hot damn! But wait... Why didn't I get this in the first game? You know, the game I waited in line for until MIDNIGHT to get. Yeah, why didn't I get it in that one? So, I called up the guy at Gamestop again.
"Hello sir. Is the new game not working either?"
"Oh no, it's working just fine. I'm killing people right now."
"Great!"
"But, why didn't I get this free card to play online in my other game?"
"Ohhh... Actually, you got very lucky."
"Very Lucky?"
"Yeah, those were only supposed to go in the Special Edition games. But they made a packaging mistake and put it in 1 out of 10 regular edition games."
"Ahhh! I see. So I was very unlucky at first, and now I'm very lucky."
"Uhm, yeah I guess so"
"Well, well, well. Things seem to work themselves out, I suppose."
So anyway, I guess I visited both ends of the spectrum dealing with this game. I got online last night with my friend Scott, and we killed people left and right. Oh yeah! Apparently, Scott got lucky too. He got one of those cards as well. So, HAHAHAHA! to all of you people that paid extra for the special addition! I gots mines fo free!!!
Subscribe to:
Comments (Atom)