
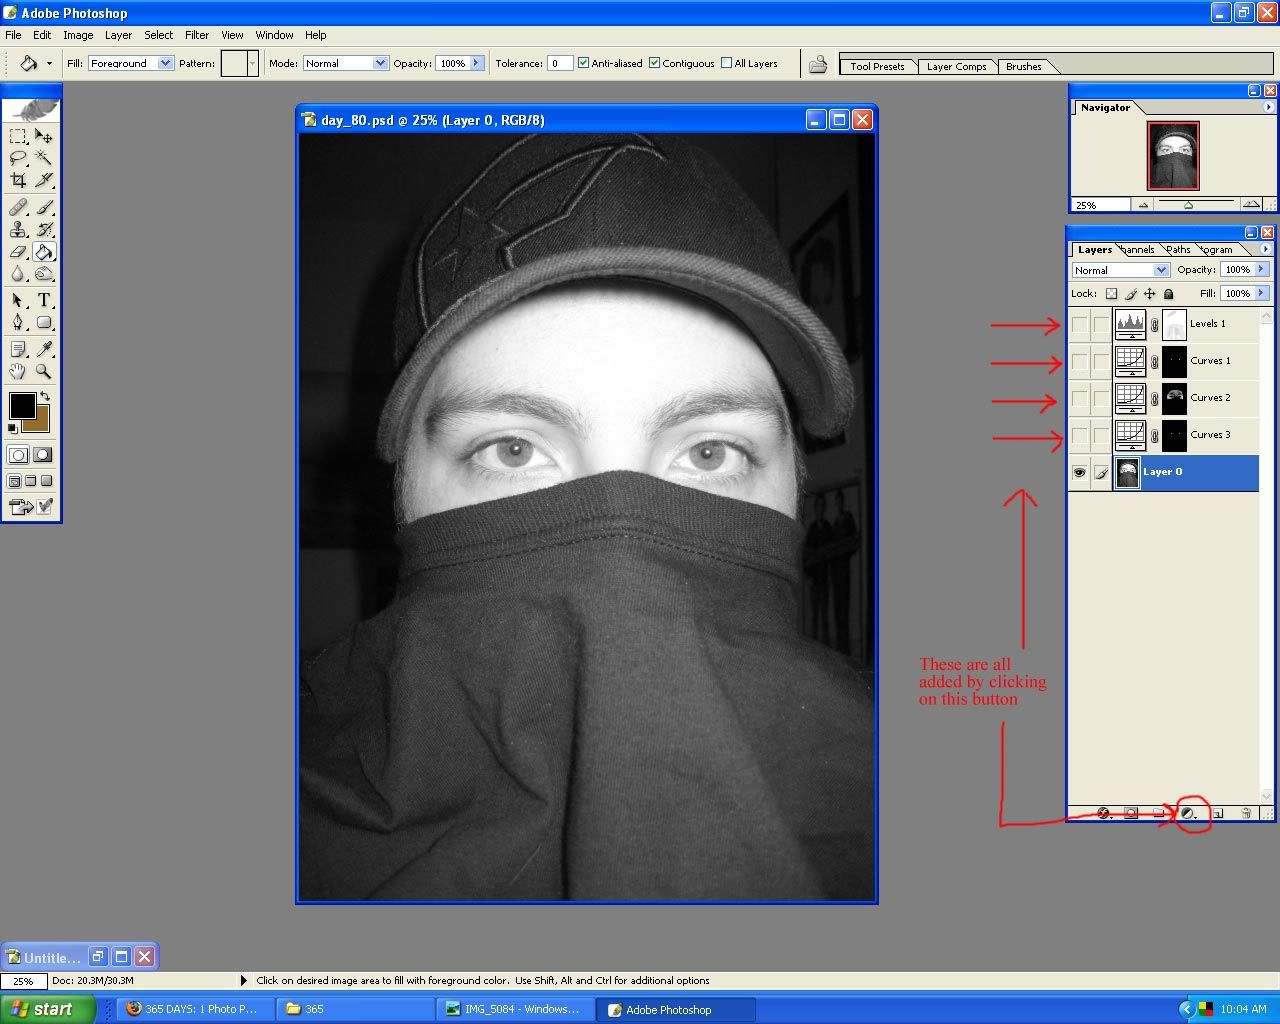
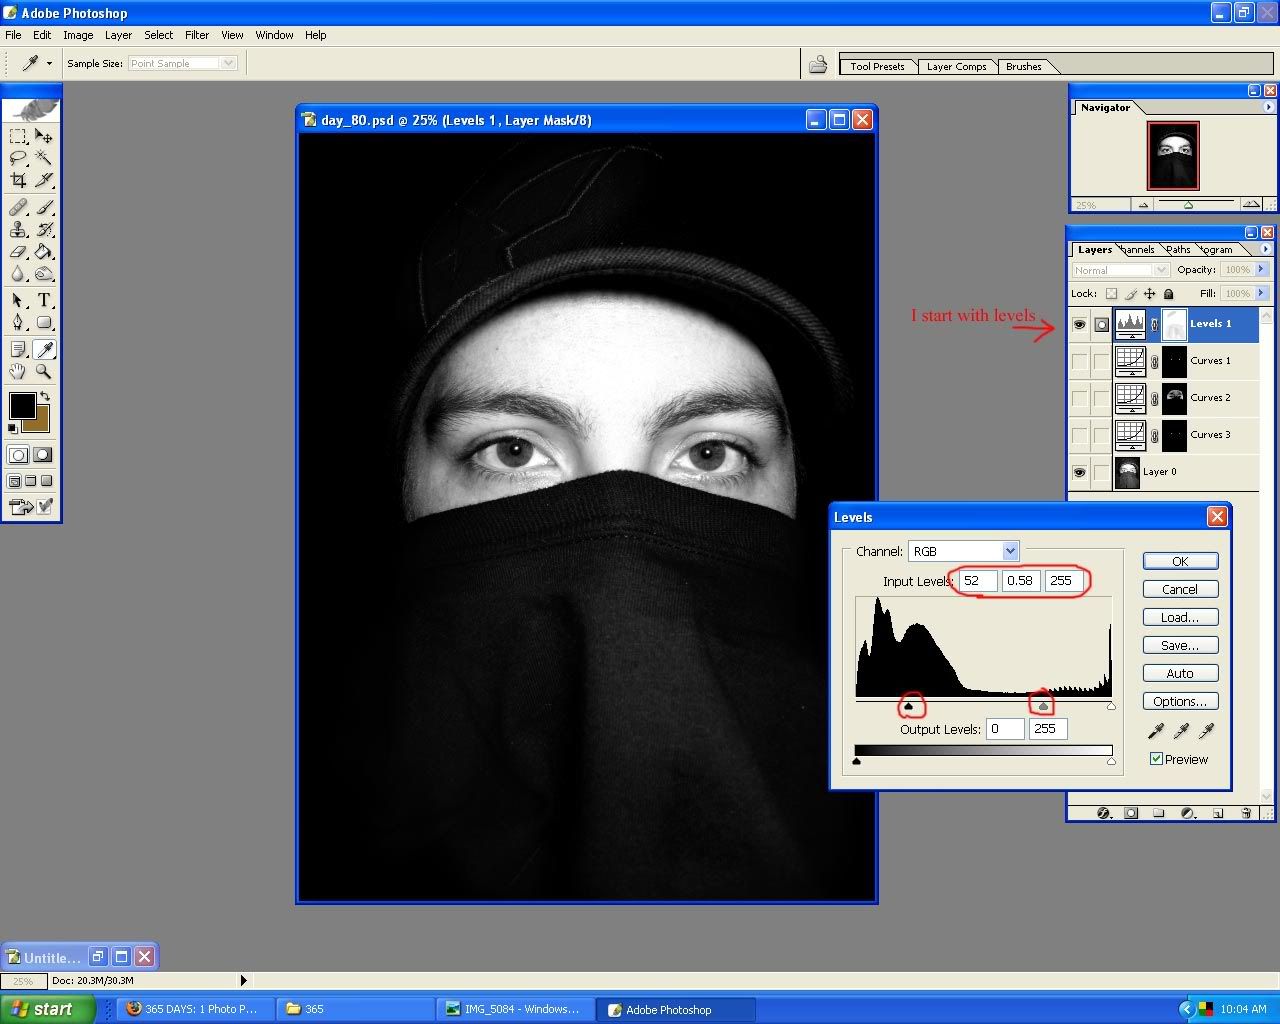
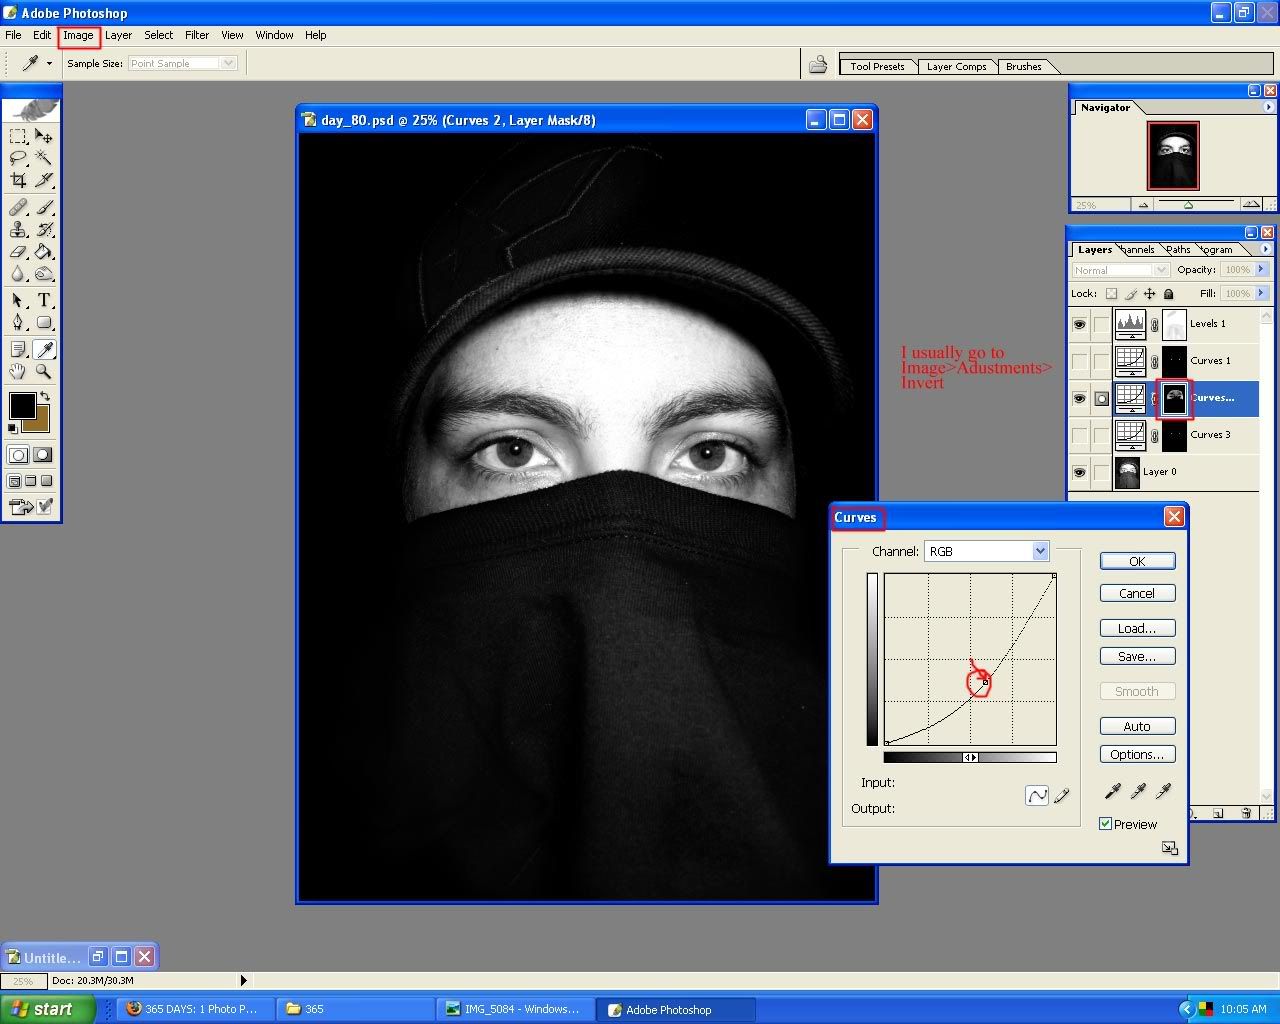
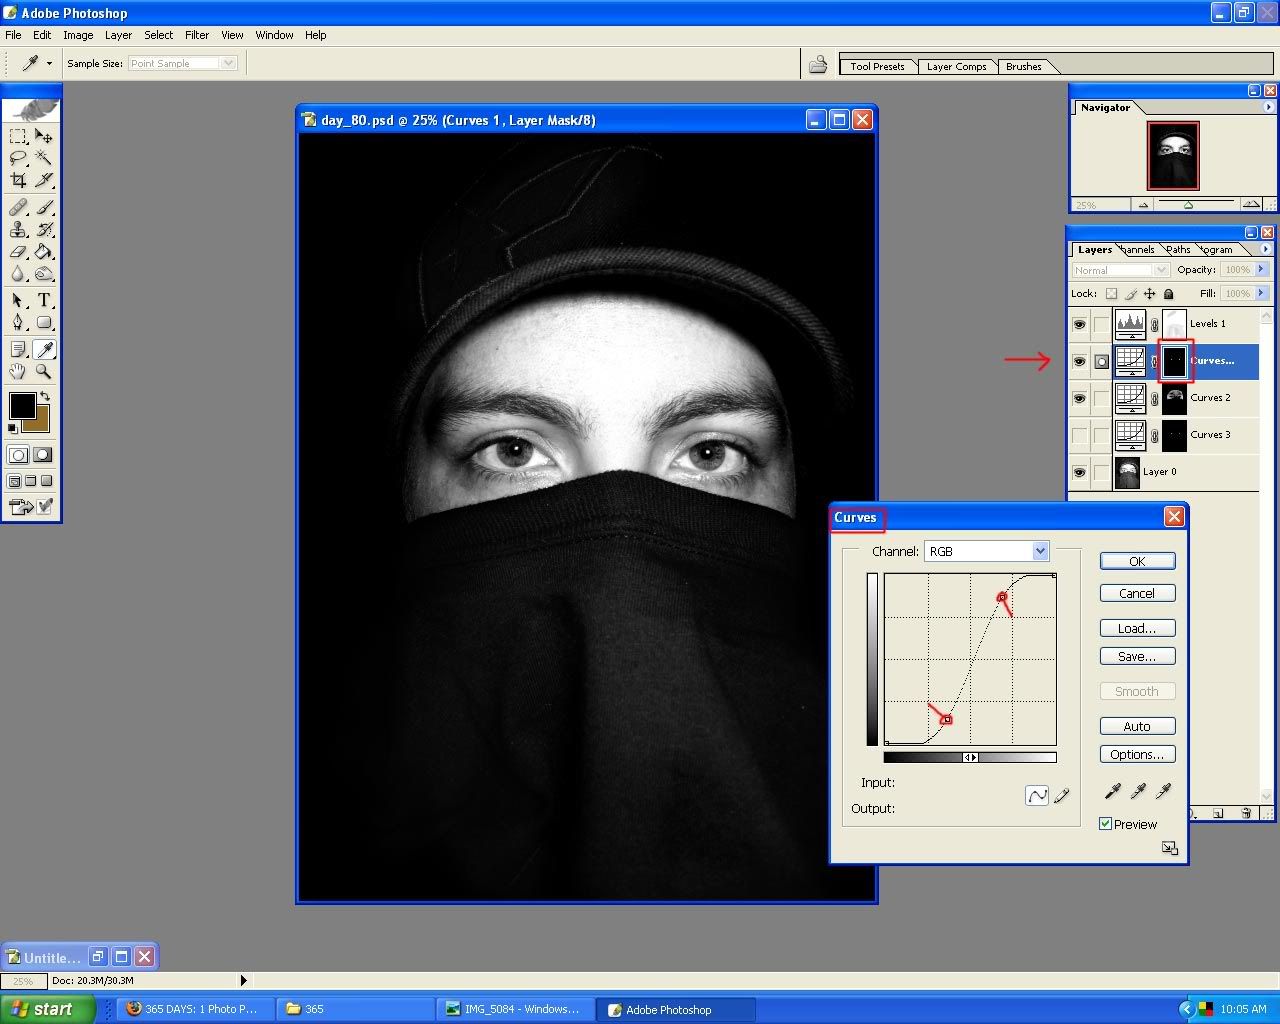
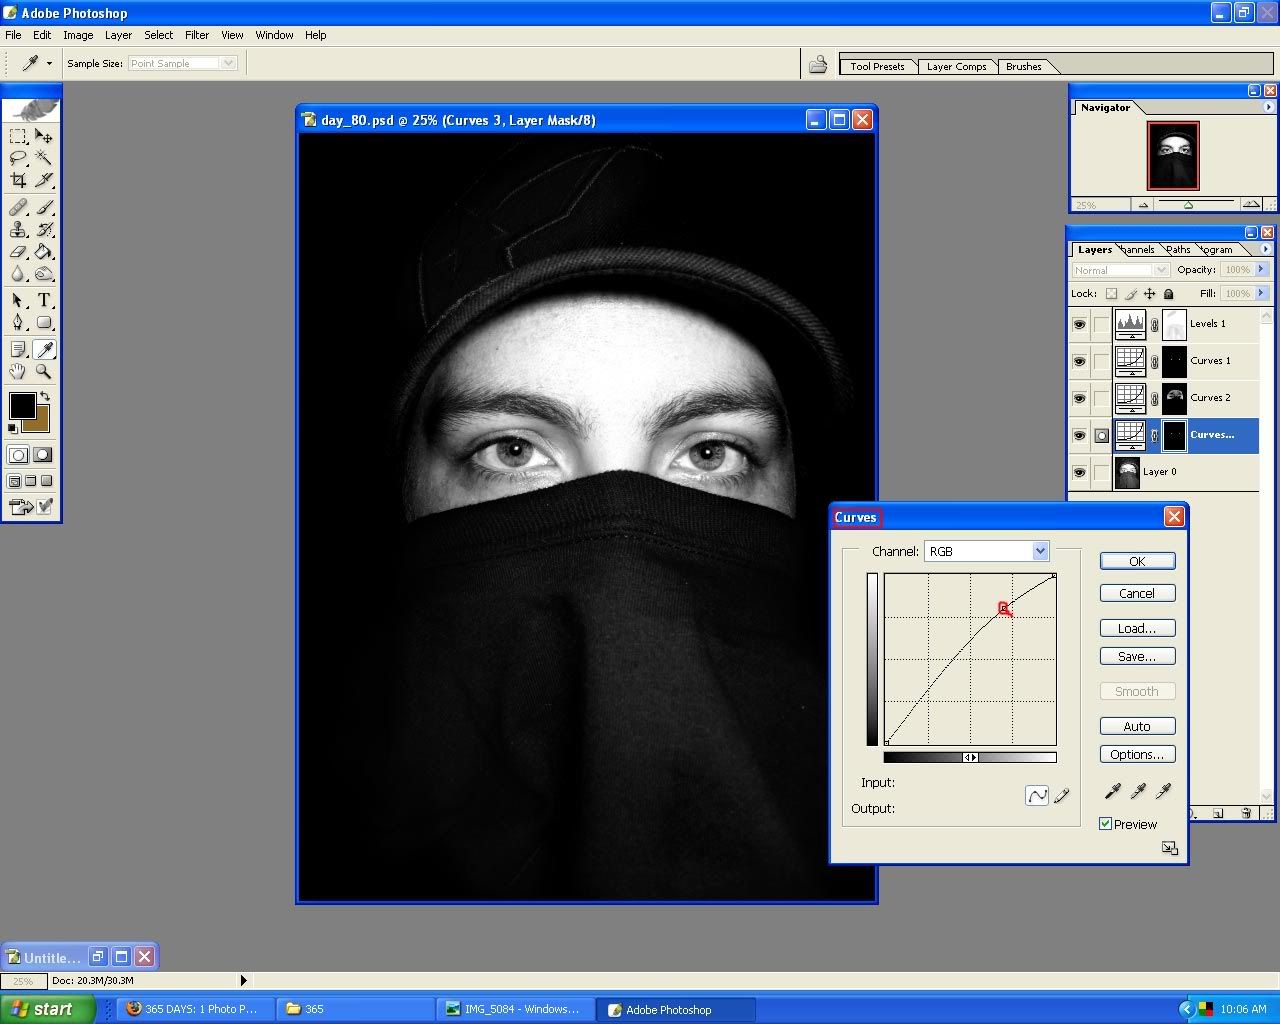
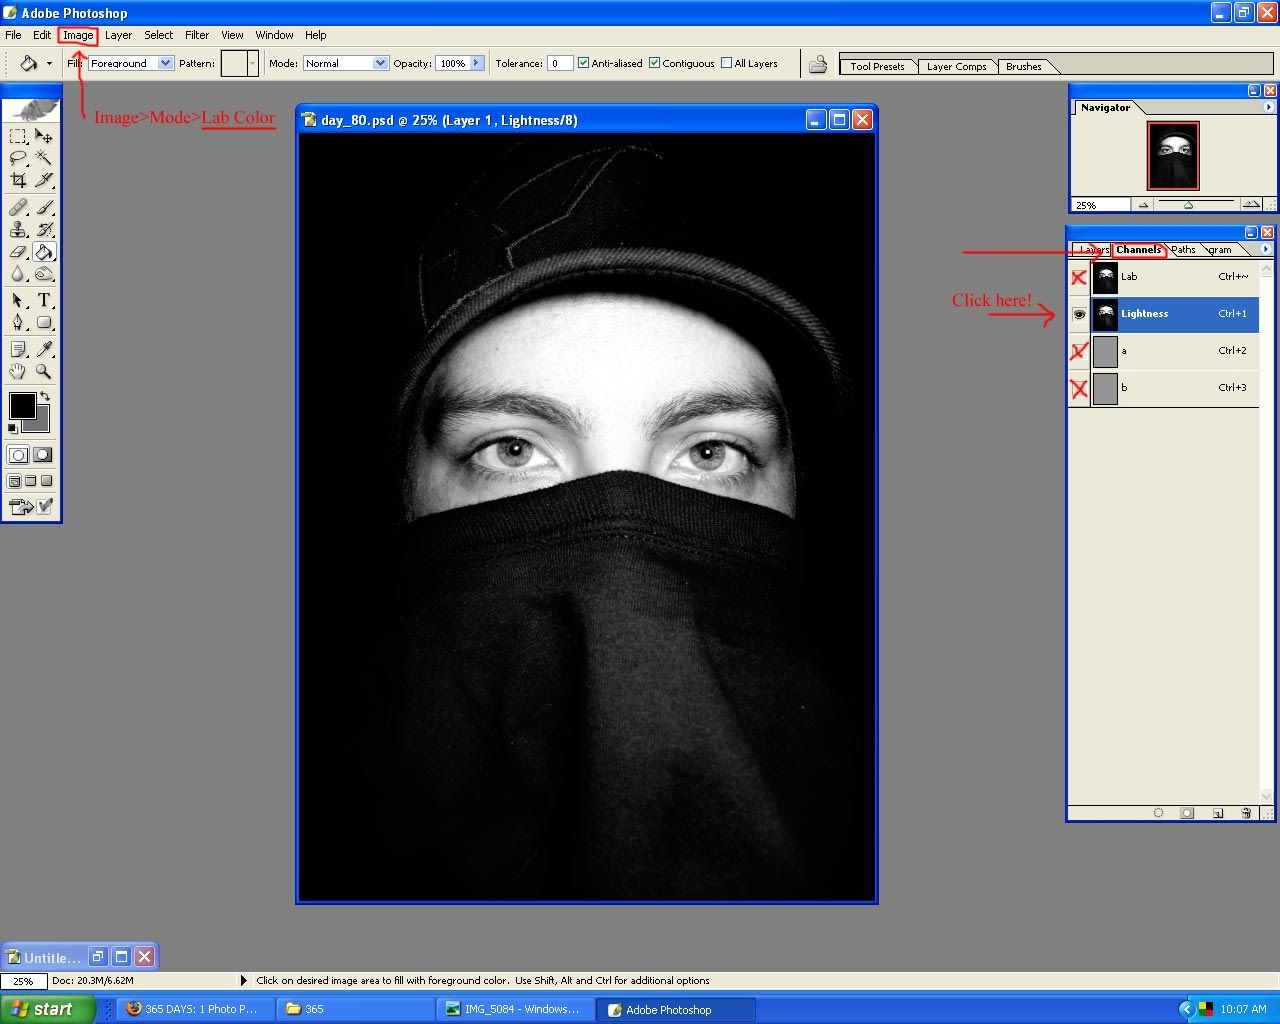
This will take any ordinary photo and make it "pop." The first thing you need to know, is that every thing is done with layers and masks. Each time you create a new adjustment layer, it also has a mask that goes with it. The mask works like this. You create an adjustment layer to make things darker. Suppose you only want the background darker but not the face. You would then go to your mask, which is located directly next to the adjustment, and paint out the face. Why would you paint it? Because the mask works in black and white. White being the adjustment you've made and black basically erasing it and putting it back to the way it was. So if the face looks fine, then you'd just paint black on the areas you wouldn't want to be affected with the adjustment. Having said that, I usually make adjustments to selected parts of the photo at a time, as to be more precise. This means that if I want to change only the way the eyes look, I'd make the adjustment while focusing on the eyes. But wait, isn't everything affected? Yes. But, you will then go up to Image>Adjustments>Invert. This will cause the mask to the adjustment you've just made to go from white to black. Black being absolute zero. This makes the photo look as it was before you adjusted it. Now, all you have to do is go and paint the areas white that you want to be affected by the adjustment layer. So I would go and paint the the mask white where the eyes are.
As far as what to do with these levels and curves adjustment layers, that is up to you. You will just have to play around with the curves, levels, etc. to see what works best for you. You can click on any of the tutorial images below to enlarge them and study them to see what I have done.
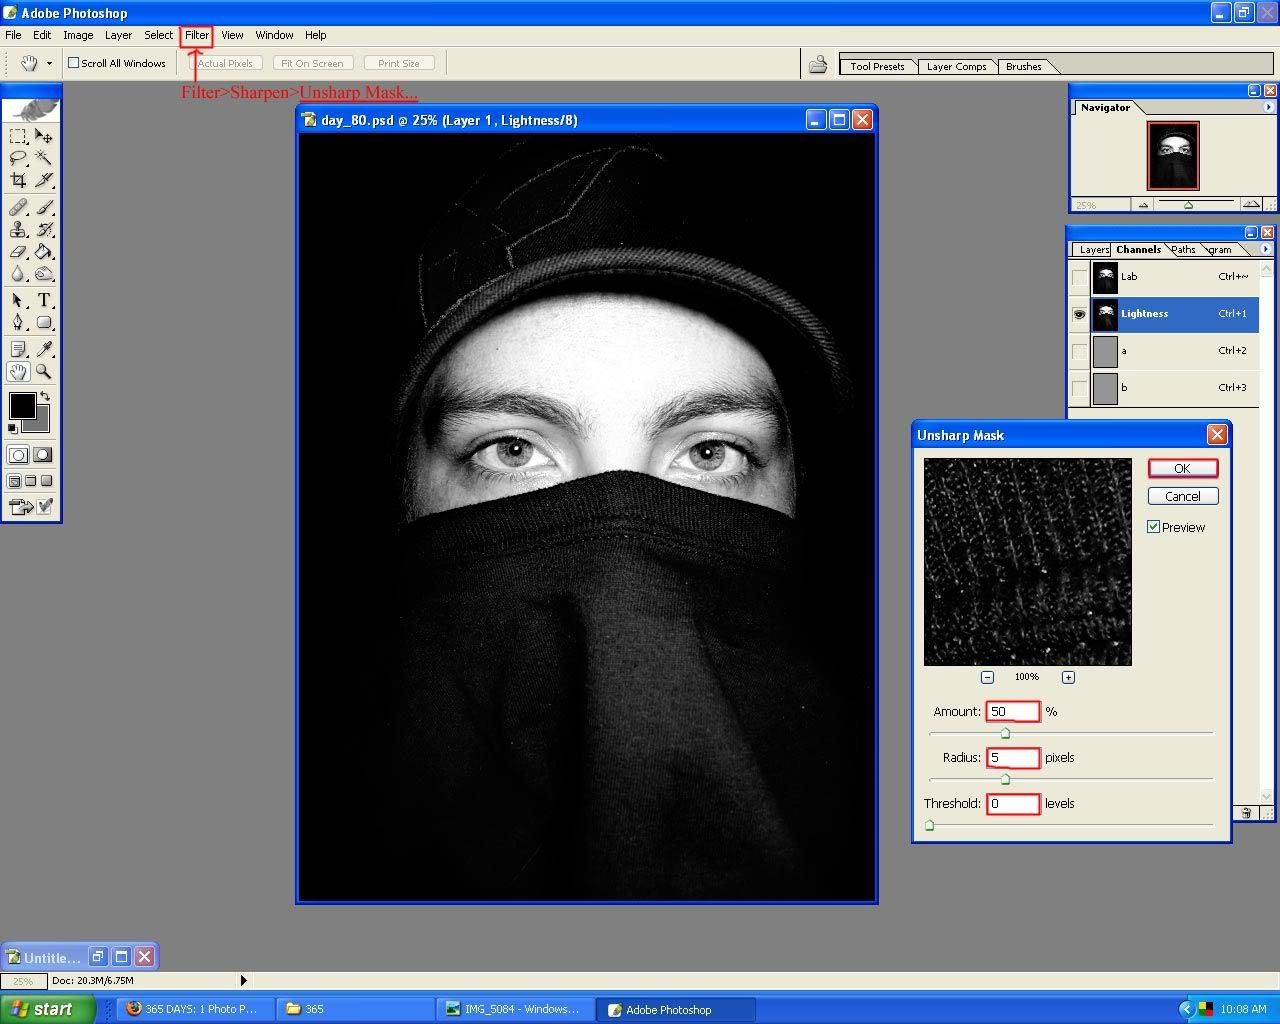
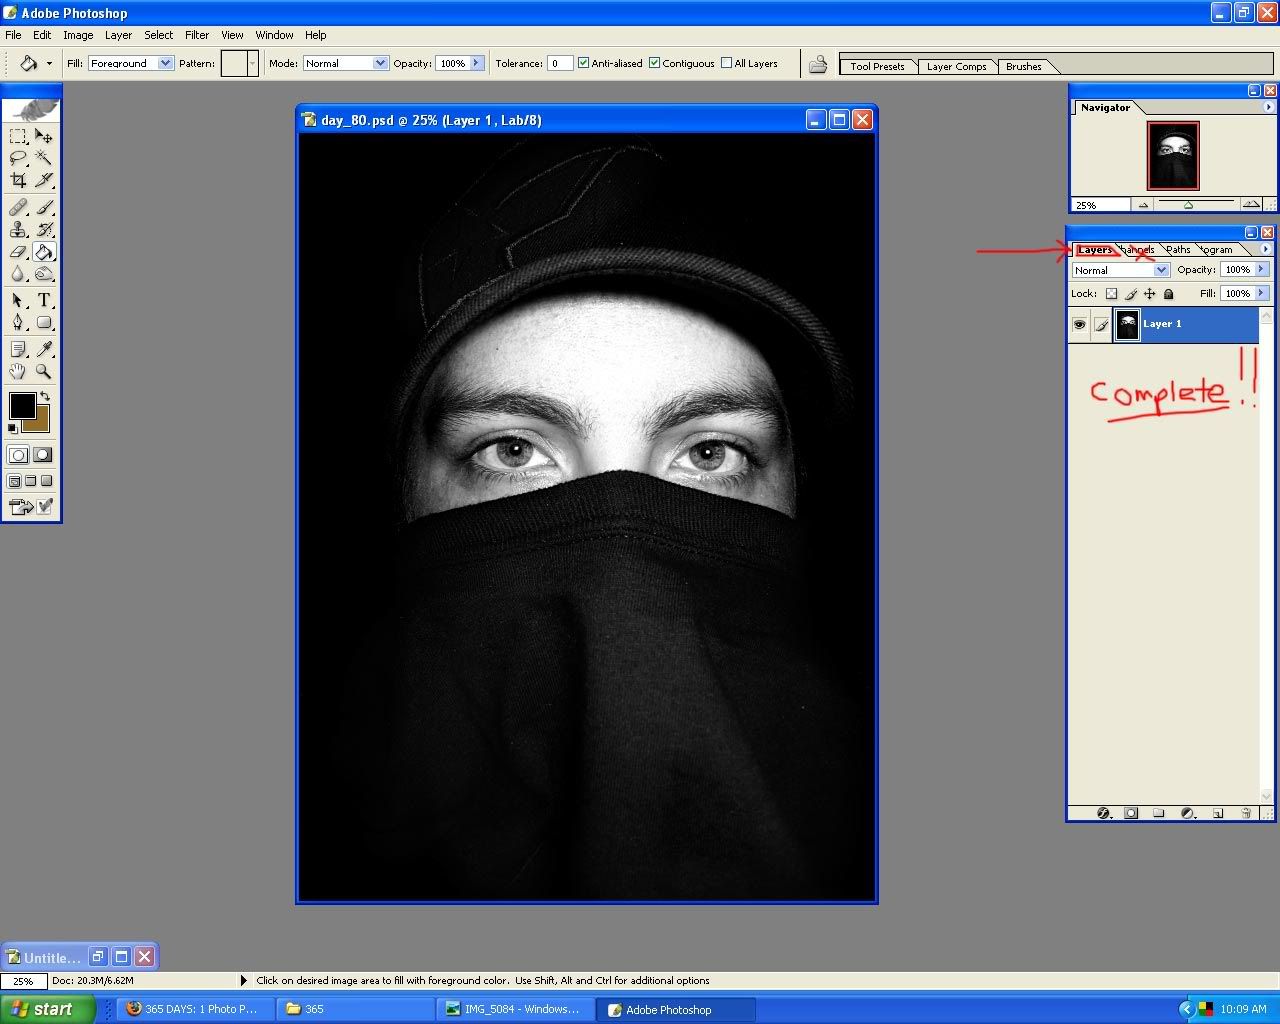
When you have made all your adjustments and you have the image the way you want it to look, you may want to sharpen it. It is very important to use this sparingly. You do not want to over sharpen your image or it will look nasty. See my examples below to check what my settings were for this photo. Those are generally the settings you'd want to use for sharpening. And as with anything else, you can use a mask with it as well. For example, if you had a picture of a flower that you wanted to look sharper, but not the background, you'd use a mask. You would just paint out the background so that only the flower is affected. Thus, putting more focus on the flower and not the distracting background.
Hope this tutorial has been helpful. Let me know if you have any questions about anything!
No comments:
Post a Comment